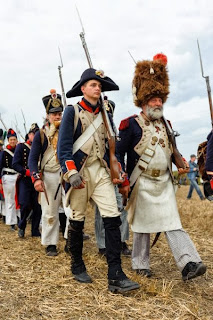
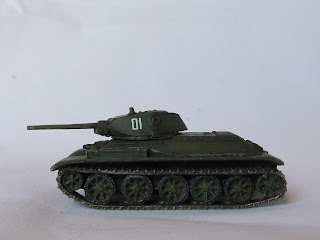
Found this on the Der Speigel.
http://www.spiegel.de/international/zeitgeist/battle-of-nations-re-enacted-by-6000-people-in-leipzig-a-929104.html
There are some great pictures of the re enactors in uniform. Where did I put my Austrians..??
Enjoy
15mm, 20mm and 28mm miniature. Modeling vehicles and aircraft 3d printing of building and miniatures
Yom Kippour War
- 0200 hrs
- 3 d printing fixes and tips
- 3d printing
- 3d printing fixes and tips
- 40k
- a
- Advance Squad Leader
- Advance Squad Leader & Squad Leader
- aircraft
- Analogue Challenge
- Aussie in Vietnam
- Aussies in Vietnam
- Australians in Vietnam
- Barkskins French and Indian wars
- Baron's War
- Battle of the Bulge
- Battletech
- Blog reviews
- blood eagle
- Bolt Action
- British
- Bushido
- casting resin
- CDS IDF variant rules
- CFR formula f1 racing
- Chain of Command
- Civil war
- Close action Naval battles
- Cold War era
- colonial miniatures
- Cons
- crescent root
- cresent root
- Cry havoc
- CY6 air combat
- D&D
- Daisho
- dungeon saga
- DVG warfighter series
- Easy Eight battleground rules
- f
- Fat Dragon
- Fins
- For sale items
- french EE
- g
- German
- GMT Panzer
- GMT solo Uboat game series
- Grosse Pointe Library WW2 series
- Grosse Pointe Library WW2 series by David Lamb
- IDF
- Impetus
- In her Majesty Name
- IPMS
- Ironclads
- Italians
- japanese
- leipzig
- Lion Rampant
- Lock & Load
- Mack my Scottish terrier
- Mail surprises
- Men who would be kings
- Model companies.
- modeling tips
- Muskets & Tomahwaks
- my good friends
- napoleonic
- Neulandia
- Night fighter Ace
- Normandy
- old school tactical
- Operation Claymore.
- p
- Painting tips.
- pathfinder
- Perry Brothers
- Pike mans Lament
- Pike mans Lament/ ECW
- Plastic Soldier Company
- Romans
- russian
- Saga
- Samurai
- sea battles
- Sharp Practice
- Sharps Practice
- sherman tank
- Six Day war 1967
- Solatire games
- SpecOps
- SPQR.
- Star Trek
- Star Wars
- Star Wars legion
- sword point rules
- ta
- tank charts
- USA
- valor & Victory
- Vassal
- Vietnam
- Vikings
- VSF
- weapons
- WW2
- WW2. Zevzda
- X-wing
- Y
- Yom Kippour
Monday, October 21, 2013
Wednesday, September 11, 2013
Visit to Fort Pulaski outside Savannah Georgia
First real vacation in twenty year was visit to Orlando Florida to Universal City. A stop in Savannah was a travel stop for the night. My first visit to Fort Pulaski was in 1982. The Air Guard unit I was with had a four days mini red flag. Where our A7D where in the thick of a bomb competition only to come it second again an F16 unit.
Well to Fort Pulaski, the first visit the Fort was very well left untouch. You could see the shell hole in the interior of the Fort. The one wall still had some gaps in it. But the impressive part was the shell lodge in the door structure of the wall. Just an amazing place. Part of the stop was to show my wife, who is a Civil War buff like me.. The Fort has been restored. Shell hole in the interior are gone. The powder magazine wall has been rebuilt. Plus the shell removed for safety reasons??
Fort Pulaski was the first American Fort to be destroyed by shell fire. When the commander officer of the Fort contacted General Lee stating that the Union Force where building siege positions. Lee's reply was not to worry no one can destroy the Fort with shot. The Union forces proved him wrong. The rifled cannon destroyed the Fort. For more information go to this website. Fort Pulaski
Now for the photos:
Fort Pulaski entrance.
20 pound Parrot Cannon
The above photo is the picture where the shell stuck next to the magazine door.
Wisely the Fort Commander surrendered shortly after the shell hit. The magazine had tons of Black powder in there at the time.
Cannon Port facing the Savannah river.
Shell holes in the wall
Picture of the wall the was destroyed by Union cannon fire. You can see the small gap in the center.
This show the gap in the Forts wall.
Monday, August 19, 2013
T34s by different manufactures
I have purchased T34s from Battlefront, Forged in Battle and PCS.
Here is how I rate them:
1) Forged in battle. Very nice and lots of detail.
2) Battle Front. Not bad models but lack detail.
3). PCS. Not the best but okay. Plus I have a ton of them.
Forged in Battle T34's
These are early T34 with add on armor
Battle Front T34
The PCS T34 I need to find what file I put them in.. Looks like I need to purchase some Forged in battle T34/85'd
Here is how I rate them:
1) Forged in battle. Very nice and lots of detail.
2) Battle Front. Not bad models but lack detail.
3). PCS. Not the best but okay. Plus I have a ton of them.
Forged in Battle T34's
These are early T34 with add on armor
Very early battle front T34
The PCS T34 I need to find what file I put them in.. Looks like I need to purchase some Forged in battle T34/85'd
Sunday, August 11, 2013
BA-64 armor car
I won these little armor cars on Ebay. Trying to round out my Russians forces. The plan was to use them with the Battlefront Kursk rules. But now that I own Bolt Action rules. Plus coming soon Chain of command from two fat lardies. The problem now which rule set to paly...lol.
The BA-64s are painted with Tamiya colors. The base color is XF-58 Olive Green. The highlight is a mixture of XF-58 and XF-4 Yellow green. Start olive green and add the yellow green until the shade looks right to you. 2 to1 olive green is a good start. The black lights are my own mix of the Future and a black Acrylic paint. To make it flow a little best add a little water.
Now for the pictures.
All comments are welcome.
Thursday, August 1, 2013
More KV's
These are the early model KV-1 with the early 76mm main gun. Fun to build. Anton did an excellent review of the kit.
Here is the linkhttp://antonswargame.blogspot.com/2013/06/two-beauties-from-zvezda-1100-scale-kv.html
Here is the linkhttp://antonswargame.blogspot.com/2013/06/two-beauties-from-zvezda-1100-scale-kv.html
The Russian Monster KV-2 with 152mm gun
Zevzda released these beasts early in July. The kit is another easy to build model. It took less than 10 minutes to assemble. These tanks stuck fear into the German Panzer Corp. Can't imagine rolling into a Russian village to find this Monster parked at the cross roads in the center of the village. One picture I recall is of a KV-2 with it turret peppered with 50mm shells stuck in it. The Germans use these tanks until the end of the end. One photo showed a KV-2 in defense of a factory in Germany again the US Sherman's.. Wonder what the Sherman tankers thought. :(
The KV-2 still need some weathering. Got to find my formula for mud. This tank just begs to cover in mud..
Hope you like them
The KV-2 still need some weathering. Got to find my formula for mud. This tank just begs to cover in mud..
Hope you like them
Tuesday, July 30, 2013
Finally Picture of PSC M3 half tracks
Okay I finally got off my butt to take pictures of my finished M3's. These are really nice models that go together quick and easy.
This time I weathered the half tracks. Polly S mud for the streaking on the side of the vehicle. After which I spray a very light coat of thinned Tamiya Buff. The tracks are painted with Tamiya Hull red. The final coat is Testors flat coat. There you go the quick an simple story. Hope you like them.
This time I weathered the half tracks. Polly S mud for the streaking on the side of the vehicle. After which I spray a very light coat of thinned Tamiya Buff. The tracks are painted with Tamiya Hull red. The final coat is Testors flat coat. There you go the quick an simple story. Hope you like them.
Subscribe to:
Posts (Atom)


