The would be a massive under taking 4 to 5 week of just print the building, Here is a video of the making and painting of this beast
Monday, August 31, 2020
Wednesday, August 26, 2020
How to paint Balin the Dwarf article is "Tale of the Painters' Blog
WEDNESDAY, JANUARY 23, 2013
TUTORIAL: HOW TO PAINT BALIN THE DWARF FROM THE HOBBIT

The ninth tutorial in this series, Balin is one of the simpler Dwarves to paint. His garments are just different shades of red. Read on to discover how I painted this miniature in 18 steps.
This tutorial assumes you have a basic understanding of how to paint. For the beginners, I will explain the techniques as I go along. Each picture below shows four chronological steps. Underneath each picture are the corresponding instructions. Each step shows the paint I used during that step. It's good to have reference material close to hand to check colours. I used google images for film stills and Games Workshop's 360º pictures on their website were a great help.
Paints you will need for this tutorial:
Black Undercoat (technical)
Cadian Fleshtone (layer)
Bloodletter (glaze)
Rhinox Hide (base)
Kislev Flesh (layer)
Administratum Grey (layer)
Pallid Wych Flesh (layer)
Dawnstone (layer)
Mournfang Brown (base)
XV-88 (base)
Doombull Brown (base)
Khorne Red (base)
Abaddon Black (black)
Wazdakka Red (layer)
Ceramite Red (base)
Carroburg Crimson (shade)
Ironbreaker (layer)
Stirland Mud (texture)

1. Undercoat the model. The details are small, so I hand undercoated the model (rather then use a spray) with Imperial Primer.
2. I painted the face and fingers with Cadian Fleshtone. I painted around the beard.
3. I changed the hue of the skin using Bloodletter glaze. Dwarves are a little more red in complexion then humans.
4. I watered down Rhinox Hide heavily and then shaded around the eyes, nose, inbetween the fingers and around the face.

5. I highlight the face with Kislev Flesh. Also if you're feeling brave, this is the opportunity to paint the eyes with a thin black line and two white dots. I tend to pluck up the courage and do it when the model is virtually finished though.
6. Paint the beard and hair with Administratum Grey.
7. Highlight the beard and hair with Pallid Wych Flesh. I find painting the raised areas carefully more accurate then dry brushing. It requires patience, practice and a steady hand, but when the set costs as much as it does, why wouldn't you want to take a bit of extra care and attention to get it right?
8. I heavily water down Dawnstone and paint the mix into the recesses of the beard and hair to give it a bit of extra depth. Don't wash it all over because it will dull the white highlights down.

9. Paint Balin's boots Mournfang Brown.
10. Highlight his boots with some XV-88.
11. Balin's overcoat should be painted with Doombull brown.
12. Now the tricky bit. Breaking down all the different reds. Using Khorne Red highlight the overcoat you paint in the previous stage but make sure you leave the material on the collar and across the shoulders as Doombull Brown. Paint his tunic including the sleeves with Khorne Red but leave the trim black. Now edge the trim with Khorne Red with thin lines.

13. Water down Abaddon Black a lot and then lightly paint it into the recesses of the overcoat. This is delicately shading the creases.
14. Highlight just the tunic and sleeves with Wazdakka Red.
15. Mix three parts Ceramite White with one part Khorne Red and then paint thin highlight lines on the overcoat. Use this mix to also pick out the raised detail on the collar/shoulder material.
16. To tweek the hue of the overcoat wash it with Carroburg Crimson. Just do the overcoat. Leave the tunic and sleeves as they are. You should see the different shades of red clearly now.

17. Paint Balin's Sword-mace with Ironbreaker.
18. Water down Abaddon Black to a consistency where you can paint thin lines on your mixing palette, then paint the cross pattern on the tunic and sleeves. Also carefully paint the pattern on the cuffs.
Finally base the model in a way which fits in with your collection. I used Stirland Mud texture paint highlighted with Karak Stone and the base edge was painted with XV-88. Static grass and scrub were glued on in small clumps.

For more Hobbit tutorials check out my Bilbo, Gandalf, Thorin, Gloin, Bombur, Ori, Dwalin and Goblin tutorials. If you found this tutorial useful, let me know in the comments.
Do you like our tutorials and reviews? Here is what you can do to support us: Check out the websites of our sponsors, place your next orders at Wayland Games by clicking here or on the banner on the right. Thank you very much, we appreciate any help to keep us going!
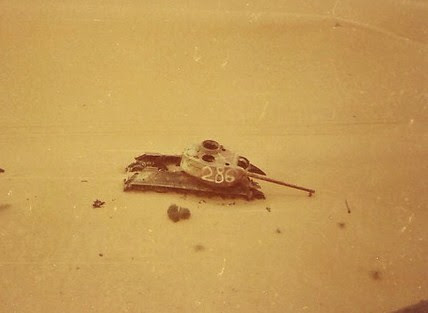
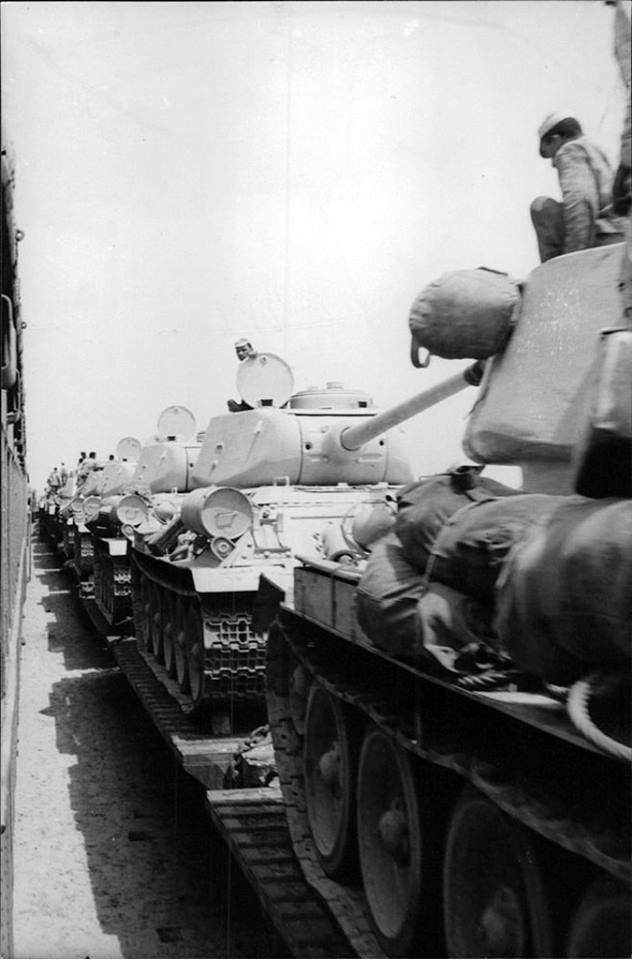
More Six day war photos
Maybe of people can use these photos as reference for their models of the era


Tuesday, August 25, 2020


Subscribe to:
Posts (Atom)