Yom Kippour War

Saturday, March 16, 2013

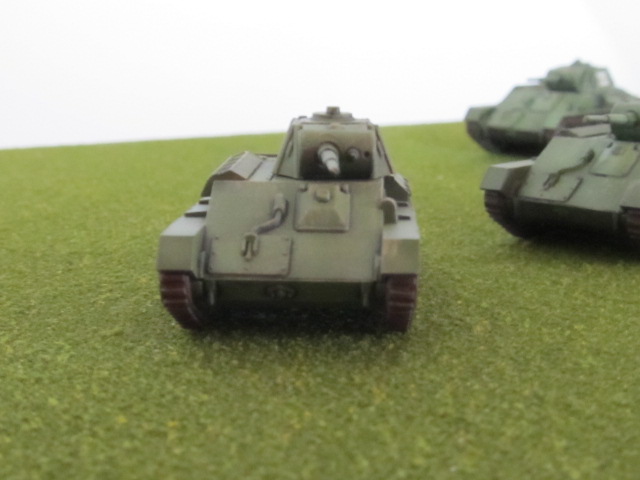
Kicking the heat with my Flame Panzer III

Another great 1/100 model from Zevzda.   The construction part was about 5 minutes.  Built these when the BA-10's started to drive nuts.  As for the build part check out Anton's site;http://antonswargame.blogspot.com/2013/02/spending-afternoon-with-some-russian_10.html  He did a excellent review.

My Flame panzer's are pattern off a pattern found on the web.  The panzer is vallejo panzer tan set.  The Red Brown is from Tamiya's Hull Red.  Both paints spray well.  This make my life easy when spraying the red brown.  Decal's are  mix from Dom's Decals and I-94. Both companies make excellent products.  Now for picture:


They still need to be weather a little.  The track on the front of the hull came from some spare track off the PSC Panzer III kits.   Waiting for PCS late Panzer III to be released.
Thanks for taking a look.

Tuesday, March 12, 2013

BA-10 in German service

Decided to do a BA-10 captured by the Germans.  Found this camo scheme on the web.  Figured I need a little extra firepower for my Sfkz 222 section.   

For a review on the BA-10 check out this http://antonswargame.blogspot.com/2013/02/pending-afternoon-with-some-russian.html
My friend Anton did an excellent review on the Zevzda BA-10.

Now for the pictures...


Sunday, March 10, 2013

Tiger I Ace

The PSC Tigers are great models.  Decided to make a Tiger Ace.  Here is my attempt at one enjoy.


The kill marking on the barrel are from I-94 enterprises.  I picked the three tone camo scheme as it seems to be common for both the eastern and western fronts. Let me know what you think.  More picture coming BA-10, skfz 222 and Panzer III flame tanks

Tuesday, January 22, 2013

What I'm working on.

My stug III's B, BA-10 and Flame PzIII's came in the post the other day.   First the PzIII flame panzer was disappointing.  It was just a re-do of Zevzda early PzIII.   But the Stug IIIB is a little jewel.  This a complete new model.  The total time to assembly all three stug's I purchased was 10 minutes.  BA-10 is another great model. The hardest part is trying to put on the headlights.  The headlights are so small I dropped one on the floor.  Now is lost forever. It is a must have if your into early Russian Front.

Overall rating for the Stug IIIB and BA-10 5 stars.   Flamepanzer 3 1/2 stars.  Just need to finish them up so I can post photos.

Wednesday, January 2, 2013

Waltzing Matilda, sneak review

Here is a little tease..  Zevzda  Matilda in the works.  My plan is to do the matilda's in the canter scheme.  This will be a challenge to tape them for the paint scheme. 
Zevzda hit another home run here..  Later


Sunday, December 30, 2012

Rumble, rumble the T70's are here..

Here for inspection is my small horde of T70's by Plastic Soldier Company.  The little beasts are fun to build.  The part the take time in the build is cutting off the injection sprues on the tracks.  Believe this problem has been talked about on "The Miniatures Pages".  All in all from removing the parts off the sprues to a complete model about 10 minutes each. 

The T70's where paint using the Russian Armor part set by AK interactive paint set.  The set is called O4B Russian Green Modulation set.  The paint is a little thick to spray for 1/100 scale armor.  This was fixed with a couple of drop of water.  

The Number on the turret came from I-94 products.  These are excellent decals.

Now for the pictures enjoy:


Saturday, December 29, 2012

Kursk Tiger in the works

Needed a few Tigers for Battlefield Kursk.   This one in still a work in progress.  Love my airbrush it makes painting the Tiger so much easier.  For a detail review check out Anton's Wargame Blog   Anton did a excellent review.  I had problems with the turret roof on all the models.  There is a gap,I just decided to live with it. Now only three more to finish up.


Hope you like my Kursk Tiger


Tiger, Tiger!! PSC new Tiger

Finished up the PSC new Tigers.  This is the first batch so far.  These are the early production Tiger used in Tunsia.  Decided to make the Tigers from 504th Company.  You will notice they are a Olive green.  The color is based from information posted on "Missing Lynx".  Great Armor modelling site.  According the people posted on "Missing Lynx" these Tiger where repainted Olive Green in Sicily before being shipped to Tunsia.  Plus information from British tanker who fought these tigers up close.  All the veterans state: They where so close I couldn't forget they where painted green.  Besides it is nice to have a different color on the table instead of the normal Afrika Korp Tan.

I used Model Master Olivegrun as a base coat.  After which I highlighted the with Olivegrun and a touch of radome tan to get a lighter tone.  Once the paint dried over night.  The next step was to put a washed on using Mig Products "Brown wash"  The Tiger was sealed with Testers Flat coat.  Hope you like them.


Friday, December 28, 2012

Game On miniature buildings

Thought I would posted a link to this company.  They make some great building in resin and MDF currently.   If your in 1/285 armor battles they make some great items.  Hoping to post pictures soon of my T-70 by PSC.  Nice little tanks for battles in Russia. 

Here is the line to Game On.

Game On

Saturday, December 22, 2012

Airbrushes

As you know I use an airbrush to paint my models.  Have been using an airbrush since about 1970. Bought my first one from the original Squadron Shop in Hazel Park, Michigan. That was about a life time ago. The airbrush was a single action Paasche H model.  This airbrush was replaced by an H Model.  In between I just a badger double action that turned out to be a pain in the butt. 

Today I found this site called Don's Airbush tips.  In his blog he reviews a harbor freight airbrush it is the Harbor Freight Deluxe for a whole 22 dollars.  Based on the review I am going to purchase one today.  And some time in the future comment on how it worked out. Below is a link to Don's blog.  Take a look at all the different airbrushes he has tested.

Enjoy

Don's Airbrushe tips

Thursday, December 20, 2012

2013 Releases from Zevzda

[linked image][linked image]
[linked image][linked image][linked image]
[linked image][linked image]

Wow looks at the T-35..  Looks like I will saving up my spare change for these.

Monday, July 16, 2012

Scans of the SDKFZ251 conversion kit

Here are some scans of the New Conversion kit for the SdKfz 251 made by the Plastic Soldier Company.  From the parts of the kit you can make the following:

4 x 251/2 81mm mortar carrier
4 x 251/9 75mm Stummel
4 x 251/10 Pak 37 for the command vehicle.
4 x 251/16 flame thrower carrier.

 Front view

Rear view.

The only bad thing is the large sink hole on the 75mm gun. But that is cause flow of plastic to fill the part.  This is no big deal and just a quick splash of putty will fix.  Can wait to put these on my Half-track.  This will be a big hit for PSC.

I give a must buy 4 1/2 stars out of 5.. 

P.S. they do take paypal and I had ordered these directly from PSC.  It took a 7 days to get the kit to Michigan in the U.S.

Thursday, July 12, 2012

Few Panzer F2 models

Hope you like the Pz IV's.  They are  part of my GD division for Kursk.


Friday, July 6, 2012

Stug III conversion finished

Here is some picture of my Stug III F conversion that I started months ago.  The Stug is painted like one used by the Grossdeutschland division in Russia.  I have an Stug III D somewhere on my work bench that just needs to be finished.


Thursday, July 5, 2012

PSC 15mm Shermans

Figured I need to post some pictures.  It has been a while.  PSC Sherman's are easy to build. Now with all the different version one can do a little mixing and match of parts. 


The Sherman where paints with a mix of Tamiya Olive drab(XF-61) and Tamiya dark yellow
(XF-60) at a ratio of 60:40.  This give a pretty good match to the original Olive used on the American Sherman during WW2.    Used this as a base coat which after I added some white to make for the high lights.  The area under the stars where coated with future floor. After the stars dried over night I put another coat over the complete tank. I found this will help cut down on the wear from handling the tank.  Next I put a pin wash over the tank in black.  Follow by weather will mud coat.  The final coat was testors dullcoat.


The above  M4A1 76mm Sherman's are done in the black and olive drab by the 2nd and 3rd armor division for operation cobra. Paint using the same process as discussed early. 

On my work bench are some firefly, M4A3's and some conversion to Mid production with some depot rebuild Sherman.  Hope to have those posted soon..

Monday, July 2, 2012

Amazing stuff with blue broad

My friend Anton has been making all kinds of terrain and vehicles out of blue broad.  I found this blog to with another blogger using blue broad for trenches and bunkers.  See the link below. Looks like blue broard is the gamers best friend today.

http://sidneyroundwood.blogspot.com/